How To Properly Air Up Your Mountain Bike Tires
Remember that last ride where your tires felt squishy and you struggled with traction on the trail? Proper tire pressure is key to a safe and enjoyable mountain biking experience. Learning how to air up a mountain bike tire correctly can significantly improve your performance and comfort. This guide will provide you with a step-by-step process, explain the importance of correct pressure, and address common misconceptions. You’ll leave here confident in maintaining your mountain bike tires!
Understanding Tire Pressure
This section explains the crucial role of correct tire pressure in mountain biking. We’ll cover the factors influencing ideal pressure, like tire size, terrain, and rider weight. Mastering this understanding will dramatically impact your riding experience.
Tire Size and Pressure
- Smaller tires generally require lower pressure for optimal performance and comfort. The smaller diameter means there’s less volume to hold air, so higher pressures make for a harsh ride and reduce grip.
- Larger tires, conversely, require higher pressures to avoid excessive deformation. Their increased volume can support more air without negatively affecting comfort, but still needs correct pressure.
For example, a 26-inch tire will likely need less pressure than a 29-inch tire for the same rider weight and terrain.
Terrain and Pressure
- Rough, rocky terrain often benefits from slightly lower pressures for enhanced traction and shock absorption. The lower pressure increases the tire’s contact patch, providing more grip.
- Smooth, hardpack trails can tolerate higher pressures to reduce rolling resistance and improve speed. This minimizes deformation and improves efficiency.
Adjusting your pressure based on the terrain is essential for optimal performance. Riding on smooth trails with low pressure can feel sluggish, while tackling rocks with high pressure can lead to loss of control.
Rider Weight and Pressure
- Heavier riders typically need higher tire pressures to prevent excessive tire deformation. A heavier rider increases the overall load on the tires.
- Lighter riders can often use lower pressures to maximize grip and comfort without compromising performance. They need less air pressure to maintain proper contact and avoid pinch flats.
The manufacturer’s recommended pressure range is a good starting point, but your weight significantly influences your ideal pressure.
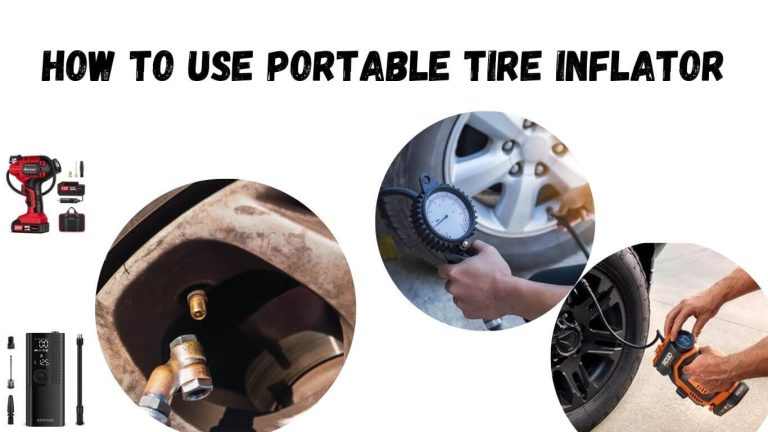
The Tools You’ll Need
This section lists the essential tools for efficiently and accurately inflating your mountain bike tires. Having the right equipment makes the job much easier and reduces the risk of damage to your tires or valves.
A High-Volume Floor Pump
A high-volume floor pump is ideal for mountain bike tires due to its ability to quickly and efficiently pump a large volume of air. Using a hand pump can be tiring and time-consuming for mountain bike tires.
A Pressure Gauge
Accurate pressure measurement is critical for optimal tire performance and safety. A reliable gauge ensures you reach the ideal pressure for your needs.
Optional: Tire Pressure Calculator
Online calculators and apps can provide personalized pressure recommendations based on your tire size, rider weight, and riding style. Many online resources can help with this.
How to Air Up a Mountain Bike Tire
This section provides a step-by-step guide to correctly inflating your mountain bike tires, covering different valve types and troubleshooting common problems. Following these steps will ensure you have the correct inflation for a safe and fun ride.
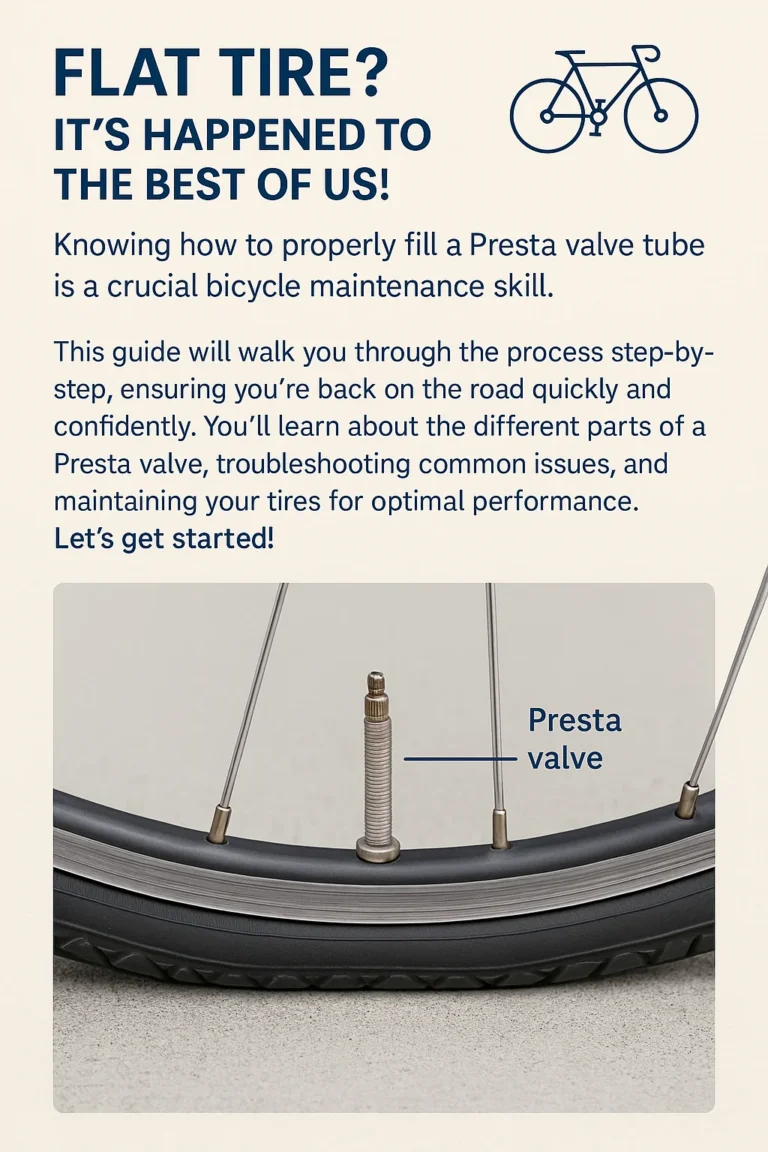
Step-by-Step Guide for Presta Valves
- Unscrew the valve cap from the Presta valve.
- Press the small pin in the center of the valve (this opens the valve).
- Connect the pump head to the Presta valve, ensuring a secure seal.
- Begin pumping steadily, keeping an eye on your pressure gauge.
- Once you reach the desired pressure, remove the pump.
- Replace the valve cap.
Step-by-Step Guide for Schrader Valves
- Unscrew the valve cap from the Schrader valve.
- Connect the pump head to the Schrader valve—it’s usually a simple push-on connection.
- Begin pumping steadily, monitoring your pressure gauge.
- Once you’ve reached the recommended pressure, remove the pump.
- Replace the valve cap.
Troubleshooting
- If the pump won’t connect, double-check that the valve is clean and free of debris.
- If the pressure gauge reads incorrectly, consider using a different gauge or having your current gauge calibrated.
- If your tire is still losing air after several attempts, there might be a puncture or a faulty valve; you should consult a bike mechanic.
Maintaining Optimal Tire Pressure
This section discusses the importance of regular tire pressure checks and provides tips for maintaining optimal pressure. Regular checks prevent underinflation and its associated risks and extend the life of your tires.
Checking Tire Pressure Regularly
It’s recommended to check your tire pressure before every ride. This is particularly crucial if you store your bike without regular use.
Factors Affecting Tire Pressure
- Temperature significantly impacts tire pressure. In hot conditions, tire pressure increases, and it decreases in cold weather. Always check before heading out.
- Tire age affects pressure retention. Older tires might lose air more quickly, requiring more frequent checks. You’ll need to pump more frequently.
Common Myths Debunked
Myth 1: Higher Pressure Always Equals Better Performance
While higher pressure reduces rolling resistance, excessively high pressure can lead to a harsher ride, reduced traction, and a greater risk of pinch flats.
Myth 2: You Only Need to Check Pressure Before Long Rides
It’s crucial to check before every ride, regardless of distance. Changes in temperature, tire age, and even storage conditions can drastically alter pressure.
Myth 3: All Mountain Bike Tires Use the Same Pressure
Tire pressure requirements vary widely depending on tire size, rider weight, and terrain. Using a generic pressure is not effective or safe.
FAQ
What is the ideal tire pressure for my mountain bike?
The ideal pressure depends on your tire size, weight, riding style, and terrain. Check your tire sidewalls for a manufacturer’s recommended range and adjust from there. A trial-and-error approach is sometimes the best to find the perfect balance.
How often should I check my mountain bike tire pressure?
It’s best practice to check before each ride. Temperature fluctuations and tire age affect pressure, making this a regular maintenance necessity.
What happens if I ride with underinflated tires?
Underinflation leads to poor handling, reduced traction, increased rolling resistance, and a higher risk of pinch flats. Your tires might bottom out and create an unsafe ride.
What happens if I ride with overinflated tires?
Overinflation can result in a harsh ride, reduced traction and increased risk of punctures. High pressure increases the chance of impacts leading to a flat tire.
How can I tell if I have a slow leak?
Check your tire pressure regularly. Consistent pressure loss over time indicates a slow leak. Inspect the tire for embedded objects.
Can I use a car tire pump for my mountain bike tires?
While possible, most car pumps are not ideal for mountain bike tires, often lacking a pressure gauge and the precise control necessary for Presta valves.
What should I do if I get a flat tire on the trail?
Carry a spare tube, tire levers, and a pump for trailside repairs. If you are uncomfortable repairing a flat on your own, familiarize yourself with the process beforehand, or call for assistance.
Final Thoughts
Knowing how to air up your mountain bike tires properly is foundational to a safe and enjoyable ride. Remember to consider your tire size, weight, terrain, and always check your pressure before each ride. Regular maintenance will ensure optimal performance and minimize the risk of flats. Invest in a good pump and gauge; a few minutes of checking your tires can save you hours of frustration later. Happy trails!