How To Inflate A Tubeless Bike Tire
Flat tire on your ride? It’s happened to the best of us! Learning how to put air in a tubeless bike tire can save you valuable time and frustration. This guide will walk you through the process step-by-step, ensuring you’re back on the road in no time. You’ll learn about the essential tools, techniques, and troubleshooting tips for successfully inflating your tubeless bike tires, preventing future issues, and extending the life of your tires.
Understanding Tubeless Tire Systems
Tubeless tires offer several advantages over traditional tube-type tires, including improved rolling resistance, reduced risk of punctures, and a more comfortable ride. However, they require a slightly different approach to inflation. This section details the components of a tubeless system and their roles in proper inflation.
Tubeless Tire
The tubeless tire itself is designed with a tight-fitting bead that seals against the rim, creating an airtight chamber. This requires a specific tire construction and rim interface.
- Bead Structure: The tire bead is designed to create a very tight seal with the rim. A poorly seated bead is the number one reason for inflation failure.
- Sidewall Material: Strong, flexible sidewalls prevent the tire from burping air under pressure.
Tubeless Rim
Tubeless-ready rims are specifically designed with a deeper, wider rim bed and a tight-fitting bead seat. The rim design allows the tire bead to create a reliable seal.
- Bead Seat: This is where the tire bead seals against the rim. Its smooth, even surface is crucial for sealing.
- Rim Tape: This tape creates an airtight seal between the spokes and the rim bed, preventing air leakage.
Sealant
Tubeless sealant is a liquid added inside the tire to seal small punctures. It’s a vital component in the tubeless system, allowing for self-sealing properties.
- Composition: Sealants typically contain latex, other polymers, and lubricating agents.
- Application: Sealant is poured into the tire before inflation. It coats the inside of the tire and seals small punctures.
Essential Tools for Inflation
Having the right tools is crucial for a smooth and efficient inflation process. This section covers the essential equipment needed for inflating your tubeless bike tire.
High-Volume Air Pump
A high-volume pump is essential to reach the required pressure quickly and effectively. Traditional floor pumps are ideal for this process. Portable mini pumps usually lack the volume needed for tubeless tires.
- Pressure Gauge: An accurate pressure gauge is essential to ensure your tire is inflated to the correct PSI.
- Pump Head Compatibility: Ensure your pump’s head is compatible with the Presta valve on your tire.
Tubeless Tire Inflator
A tubeless tire inflator, also known as a blast valve, is a device that helps seat the tire bead more effectively by quickly pushing a burst of high pressure air into the tire. This reduces the amount of force required.
- Ease of Use: A tubeless inflator helps push air into the tire quickly and consistently, eliminating the need for excessive force or difficult hand pumping.
- Seating Bead: This helps to overcome the initial resistance of seating the tire bead onto the rim.
Tubeless Tire Sealant
While your tire may already contain sealant, it’s important to periodically check and refill it if needed. The sealant will degrade over time.
- Regular Maintenance: Check the sealant level regularly (every few months) and top it off as necessary.
- Effectiveness: Sufficient sealant quantity is crucial for proper puncture sealing. Check the manufacturer’s recommendations for the amount of sealant to use.
How to Inflate a Tubeless Tire: A Step-by-Step Guide
This section details the complete process of inflating a tubeless tire. Proper technique will ensure a successful and safe experience.
Preparing the Tire and Rim
Before you begin, inspect the tire for any obvious damage or debris. Ensure the rim tape is properly seated. This will ensure a secure and reliable seal.
- Inspect the tire and rim for damage or debris.
- Check the valve stem and ensure it is securely installed.
- Ensure the rim tape is properly applied and sealed.
Adding Sealant (If Necessary)
If you need to add sealant, this is the time to do so. Add the sealant through the valve stem. Follow the manufacturer’s instructions on the proper amount.
- Add the correct amount of sealant through the valve stem.
- Rotate the tire to ensure sealant is evenly distributed.
- Use a needle to remove any excess sealant from the valve stem.
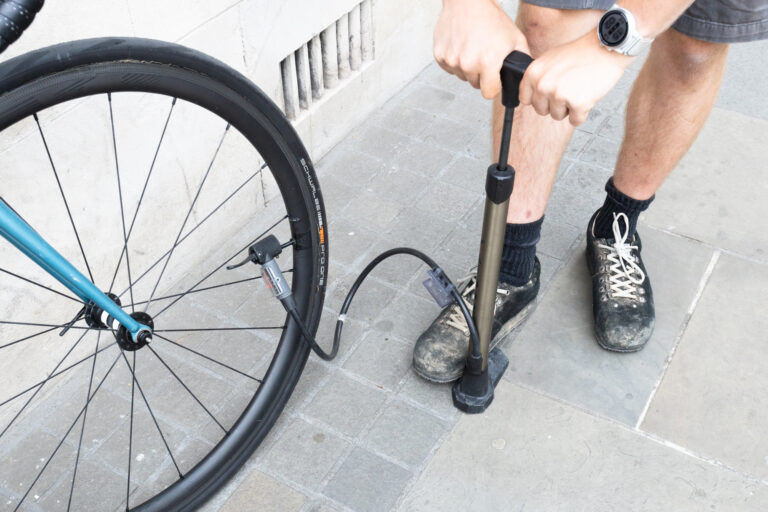
Seating the Bead with a High-Volume Pump
Attach the pump head to the valve and begin inflating with a continuous, steady stream of air. This is where the inflator comes into play.
- Attach the pump head to the valve stem.
- Start inflating quickly and steadily.
- Listen and feel for the distinct “snap” as the bead seats into the rim.
Seating the Bead with a Tubeless Tire Inflator
For very stubborn tires, a tubeless tire inflator can make this step much easier. This tool provides a rapid burst of air that helps to seat the bead.
- Attach the inflator to the valve stem.
- Engage the inflator lever or button.
- Observe the tire and listen for the tell-tale “snap”.
Checking the Tire Pressure
Once the bead is seated, check the tire pressure with a pressure gauge. Inflate it to the manufacturer’s recommended pressure and you’re done!
- Proper Pressure: Use a gauge to check the tire pressure. Inflating your tires correctly is crucial for safety, performance, and tire longevity.
- Manufacturer Recommendation: Consult the tire’s sidewall for the recommended pressure range. This range will vary depending on the tire size and intended use.
Troubleshooting Common Issues
Even with the correct technique, sometimes things don’t go as planned. This section addresses common problems and their solutions.
The Bead Won’t Seat
If the bead refuses to seat, there could be several reasons such as improper rim tape, a damaged tire, or insufficient air pressure.
- Check Rim Tape: Ensure the rim tape is properly seated and free of gaps or damage.
- Inspect the Tire and Rim: Look for any damage to the tire or rim that might be preventing a proper seal.
- Use a Tubeless Tire Inflator: If you’re struggling to seat the bead, a tubeless tire inflator can provide the extra pressure needed.
Air Leaking from the Valve Stem
Air leakage from the valve stem is often caused by a loose valve core or a damaged valve stem.
- Tighten the Valve Core: Use a valve core removal tool to tighten the valve core.
- Replace the Valve Stem: If the valve stem is damaged, replace it with a new one.
- Apply Sealant: Ensure that sufficient sealant is inside the tire and around the valve stem area to prevent leaks.
Myths about Tubeless Tires
Myth 1: Tubeless tires are difficult to inflate.
While they require a slightly different technique than traditional tube tires, with the right tools and techniques, inflating tubeless tires is manageable. The use of a high-volume pump and/or a tubeless tire inflator simplifies this process significantly.
Myth 2: Tubeless tires are always leak-free.
Although tubeless tires significantly reduce the risk of punctures, they’re not entirely leakproof. Small punctures can occur, but usually these can be self-sealed by the sealant within the tire.
Myth 3: Tubeless setup is too complicated.
While there are more components than a standard tube tire, the setup is surprisingly straightforward. With a bit of patience, it is manageable, even for beginners.
FAQ
What is the best way to seat a stubborn tubeless tire bead?
If a tire bead proves stubborn, using a tubeless inflator is recommended. This provides a higher volume of air at a more rapid pace, assisting the seating process. Alternatively, you can try using soapy water to lubricate the bead and rim to help it seat.
How often should I add sealant to my tubeless tires?
It depends on the sealant’s specifications and climate. Usually, checking sealant levels every 2-3 months and topping them off as necessary is a good practice.
What happens if my tubeless tire loses pressure?
If pressure is lost, investigate for punctures or sealant degradation. If the loss is gradual, more sealant might be required; if rapid, there is likely a puncture.
Can I use a regular pump to inflate tubeless tires?
A high-volume pump is preferable for quick inflation, but a standard pump can still be used, although it will take more time and effort.
What type of sealant should I use for my tubeless tires?
Many brands offer high-quality sealants. Select a sealant that is compatible with your tire and rim. Consider factors like climate and riding conditions when choosing a sealant.
What should I do if I have a large puncture in my tubeless tire?
Large punctures require more than just sealant. You may need to repair the tire or replace it depending on the severity of the damage.
Why is my tubeless tire losing air slowly?
Slow air loss can be due to a few factors, including degraded sealant, a small puncture, or poor rim tape seal. Check these areas and address them accordingly.
Final Thoughts
Mastering the art of how to put air in a tubeless bike tire is a valuable skill for any cyclist. By understanding the components, using the correct tools, and following the steps outlined in this guide, you can confidently inflate your tubeless tires and avoid the frustration of flats. Remember to check your tire pressure regularly and top up your sealant as needed to maintain optimal performance and extend the lifespan of your tires. Now, get back out there and enjoy your ride!