How To Inflate Bicycle Tires With A Presta Valve
Flat tire? It’s happened to the best of us! Knowing how to quickly and efficiently inflate your bicycle tires is a crucial skill for any cyclist. This guide focuses on how to put air in bicycle tires with a Presta valve, providing a step-by-step process and helpful tips to ensure you’re back on the road in no time. You’ll learn everything you need to know, from identifying the valve type to troubleshooting common problems, making your cycling adventures smoother and safer.
Understanding Presta Valves
Presta valves, also known as French valves, are commonly found on higher-end bicycles and road bikes. They are characterized by their slender, screw-on mechanism. This section will explain the unique features of the Presta valve and how they differ from Schrader valves, equipping you with the knowledge to confidently tackle inflation.
Presta Valve Anatomy
- The Valve Stem: This is the long, thin part of the valve that extends from the tire rim. It houses the internal mechanism that controls air flow.
- The Locking Nut: Located at the top of the valve stem, this nut is unscrewed to allow air to flow. It prevents accidental deflation.
- The Inner Valve: This is the pin located within the valve stem which opens and closes to allow air in and prevents air leakage. It retracts when depressed.
Understanding these parts is fundamental to successfully inflating your tires.
Differences Between Presta and Schrader Valves
Presta valves are slimmer and require a specific type of pump head, making them initially more challenging to use. Schrader valves, found on most car and bicycle tires, are much easier to inflate with most pumps.
| Feature | Presta Valve | Schrader Valve |
|---|---|---|
| Shape | Thin and long | Thicker and shorter |
| Inflation Method | Requires unscrewing the locking nut | Direct inflation |
| Pump Compatibility | Requires a Presta-compatible pump or adapter | Compatible with most pumps |
How to Inflate Tires with a Presta Valve
This section provides a step-by-step guide on how to put air in bicycle tires with a Presta valve, using clear, concise instructions. Mastering these steps will ensure efficient and safe tire inflation. We’ll cover the process, from preparing your equipment to checking the tire pressure.
Step-by-Step Inflation Process
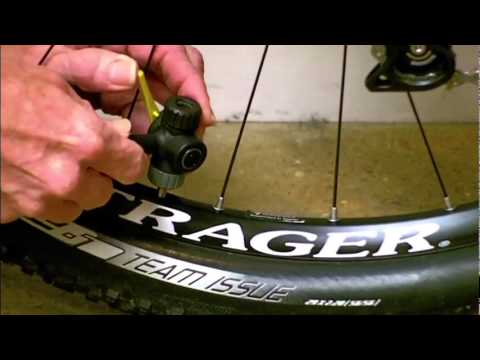
- Unscrew the Locking Nut: Carefully unscrew the small nut at the top of the Presta valve by turning it counter-clockwise. This will release the inner pin and allow air flow.
- Attach the Pump: Ensure your pump has a Presta-compatible head. Firmly press the pump head onto the valve stem until you hear a secure seal. If your pump only has a Schrader head, an adapter is needed.
- Inflate the Tire: Begin pumping air into the tire. Use the pressure gauge on your pump (if available) to reach your desired tire pressure (found printed on the sidewall). If you dont have a gauge, pump until the tire feels firm.
- Tighten the Locking Nut: Once the tire is inflated to the correct pressure, carefully tighten the locking nut by turning it clockwise. Make sure it is securely fastened to prevent leakage.
Choosing the Right Pump
- High-Volume Pumps: These pumps quickly inflate tires, making them ideal for regular use and those with higher tire volumes.
- Mini Pumps: Perfect for on-the-go repairs, but require more effort to inflate. These are a good backup if you can’t bring a larger pump.
- Frame Pumps: Mountable on your bike frame for easy access and storage. They are useful for regular top ups during your journey.
Troubleshooting Common Problems
This section addresses common issues encountered while inflating Presta valves, offering practical solutions to get you back on the road quickly. We’ll cover problems like leaks and pump compatibility issues.
Dealing with Leaky Valves
- Check the Valve Seal: Ensure the locking nut is fully tightened and that there are no visible cracks or damage to the valve stem.
- Clean the Valve Stem: Dirt and debris can interfere with the seal between the valve and pump. Clean it thoroughly with a brush or compressed air.
- Valve Core Replacement: If the leak persists despite cleaning, the valve core might be faulty and need replacement. A new core can be purchased cheaply from bike shops.
Pump Compatibility Issues
If your pump isn’t designed for Presta valves, you’ll need an adapter. These are small, inexpensive attachments that allow you to use a Schrader-only pump with a Presta valve.
Mythbusting: Presta Valves are Difficult
Presta Valve Myths Debunked
- Myth 1: Presta valves are too complicated to use. Reality: With a little practice, inflating Presta valves becomes second nature.
- Myth 2: Presta valves are more prone to leaks. Reality: Properly maintained Presta valves are just as reliable as Schrader valves. Leaks are usually due to poor maintenance.
- Myth 3: Presta valves are difficult to repair. Reality: Replacing a Presta valve core is a straightforward process, requiring only a small tool.
Maintaining Your Presta Valves
Regular maintenance is key to preventing problems and ensuring the longevity of your Presta valves. This section highlights essential maintenance tips to keep your tires inflated and your rides smooth.
Regular Cleaning
Dust, grit and mud can obstruct the valve mechanism and cause leaks. Wipe down the valve stem regularly with a damp cloth.
Checking for Damage
Periodically inspect the valve stem for cracks, bends, or other signs of damage. A damaged valve may need replacement.
Lubrication
Applying a small amount of lubricating oil to the valve stem can help prevent sticking and improve the lifespan of the valve.
FAQ
What is the correct tire pressure for my bicycle?
The recommended tire pressure is printed on the sidewall of your tire. It will typically range between 60-100 PSI (pounds per square inch) depending on the tire and your weight.
What should I do if my Presta valve won’t inflate?
First, check that the locking nut is completely unscrewed. Then, ensure that the pump head is securely attached to the valve stem. If the problem persists, clean the valve and check for any damage or consider replacing the valve core.
Can I use a Schrader pump with a Presta valve?
Yes, you can use a Schrader pump with a Presta valve by using a Presta to Schrader adapter.
My tire is still leaking after inflating, what could be wrong?
Several issues could cause a slow leak, such as a punctured tube, a damaged valve core, or a poor seal between the rim and the tire. Inspect the tire carefully for puncture and check the valve for damage before attempting another inflation.
How often should I check my tire pressure?
It’s a good idea to check your tire pressure before every ride. This ensures optimal performance and helps prevent flats.
Where can I buy Presta valve parts?
Most bike shops and online retailers sell Presta valve parts such as valve cores and adapters.
What is the best way to remove a stuck Presta valve core?
You’ll need a Presta valve core removal tool, readily available at any bike shop. It’s a small, usually inexpensive tool to unscrew the valve core. Use it gently to avoid causing damage.
Final Thoughts
Mastering the art of how to put air in bicycle tires with a Presta valve is essential for any cyclist. By following the steps outlined in this guide, you’ll be prepared to handle flat tires confidently and efficiently. Regular maintenance and understanding the parts of your Presta valve will ensure smooth, safe rides, keeping you on the road and enjoying your cycling adventures. Remember to always check your tire pressure before each ride for optimal performance and safety.