How To Inflate New Bike Tires Properly
Remember that first wobbly bike ride? The tires felt soft, and the ride was bumpy. Learning how to put air in new bike tires is crucial for a safe and enjoyable cycling experience. This guide will walk you through the entire process, from choosing the right pump to achieving the perfect tire pressure, ensuring smooth rides every time. You’ll learn how to avoid common mistakes and keep your tires properly inflated for optimal performance.
Choosing the Right Pump
Selecting the right bicycle pump is the first step to successfully inflating your tires. Different pumps offer varying levels of efficiency and ease of use. This section will guide you through the different types and help you make an informed decision.
Floor Pumps
- Floor pumps are known for their high-volume capacity and precise pressure gauges. They are typically larger and more stable than other pump types, allowing for greater control and consistent inflation. They are best for serious cyclists or those who frequently inflate their tires.
- The larger base provides stability, preventing tipping during inflation. This is particularly beneficial for those with higher-pressure tires requiring more effort to inflate.
Hand Pumps
- Hand pumps are portable and compact, ideal for carrying in a backpack or bike bag. They are less powerful than floor pumps, requiring more effort to achieve high tire pressure, especially for larger tires.
- These are well-suited for quick inflation checks and minor pressure adjustments when out on a ride. Their portability makes them ideal for repairs on the go.
Mini Pumps
- Mini pumps are the smallest and lightest option, perfect for emergency repairs on the road. However, they offer the least efficient inflation, often requiring numerous pumps to achieve the desired pressure.
- Their compactness makes them perfect for inclusion in a basic repair kit, allowing for emergency tire inflation in case of a puncture or low pressure.
Inspecting Your Bike Tires
Before you start inflating, it’s essential to check the condition of your tires. This section will show you how to visually inspect your tires for any damage and how to check the recommended tire pressure.
Checking for Punctures or Damage
- Carefully examine the tire’s surface for any cuts, embedded objects, or significant wear and tear. Even small punctures can lead to slow leaks over time.
- Rotate the wheel to inspect the entire tire circumference. Look for bulges or unusual wear patterns that could indicate internal damage.
Locating the Recommended Tire Pressure
- The recommended tire pressure is usually printed on the tire’s sidewall. It’s typically expressed in PSI (pounds per square inch) or BAR (bars).
- Pay attention to the pressure range provided; inflating your tires to the higher end of the range will provide a firmer ride and better efficiency. However, over-inflation can lead to discomfort and potential damage.
How to Put Air in New Bike Tires
This section is the core of the guide, providing step-by-step instructions on how to successfully inflate your bike tires using various pump types. We’ll also address common issues encountered during inflation.
Attaching the Pump
- Locate the valve stem on your tire. This is usually a small, protruding metal piece. The most common valve types are Presta and Schrader.
- For Presta valves, you need to carefully push down the valve core (the small pin in the center). For Schrader valves, you simply push the pump head onto the valve.
Inflating the Tire
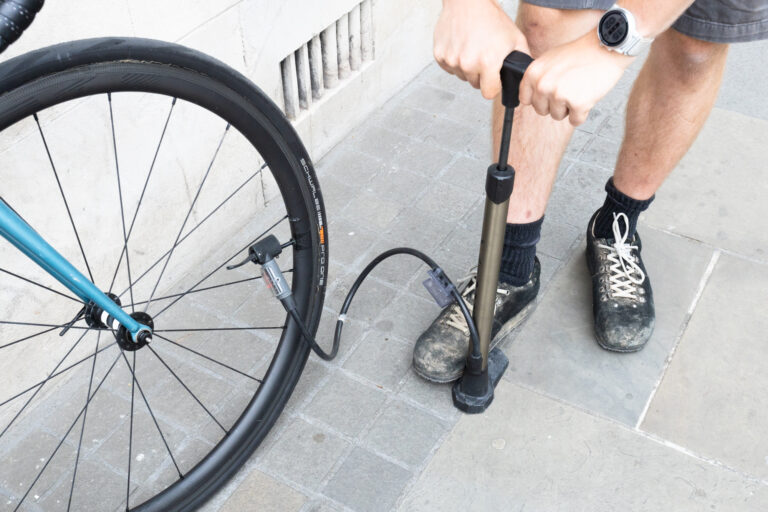
- Begin pumping steadily. For floor pumps, use a smooth and consistent pumping action. For hand pumps, maintain a steady rhythm. For mini-pumps, be prepared for more effort.
- Regularly check the tire pressure using a pressure gauge. This is especially important if you’re aiming for a specific pressure. Stop when you reach the recommended pressure listed on the tire sidewall.
Detaching the Pump
- Once the desired pressure is reached, carefully remove the pump head from the valve stem. For Presta valves, make sure the valve core is fully retracted and sealed.
- Give the tire a visual check for any signs of leaks or uneven inflation. If necessary, you might need to readjust the pressure.
Maintaining Proper Tire Pressure
Maintaining consistent tire pressure is key for optimal performance and safety. This section covers the importance of regular checks and the impact of incorrect pressure on your ride.
Regular Pressure Checks
- Check your tire pressure at least once a week, or more often if you ride frequently. Tire pressure naturally decreases over time due to leakage and temperature fluctuations.
- A properly inflated tire provides a smoother, more efficient ride, improving your overall cycling experience.
Consequences of Under-inflation
- Under-inflated tires increase rolling resistance, requiring more effort to pedal and leading to decreased efficiency and speed.
- Underinflation increases the risk of pinch flats, where the tube gets pinched between the rim and the road, causing punctures.
Consequences of Over-inflation
- Over-inflated tires can lead to a harsh and uncomfortable ride, reducing traction and increasing the chance of a blow-out.
- Over-inflation can also cause damage to the tire and the rim, resulting in costly repairs.
Troubleshooting Common Issues
This section addresses some of the problems that cyclists might encounter when inflating their tires. We’ll provide solutions for each issue and offer advice on how to avoid such problems in the future.
The Tire Won’t Inflate
This could be due to a number of issues: a punctured tire, a faulty valve core, or a wrongly attached pump head. A visual inspection is important to determine the root cause. If you have a puncture, you’ll need to repair or replace your inner tube. A faulty valve core usually needs replacing. Ensure the pump head is securely attached to the valve stem.
The Pressure Gauge Is Inaccurate
Pressure gauges can sometimes be inaccurate due to wear and tear or manufacturing defects. It’s a good idea to cross-reference the gauge readings with another one. If inaccuracies persist, consider replacing the gauge.
My Tires Keep Losing Air
This is an indication of a slow leak, likely due to a small puncture in the inner tube. You will need to inspect the tire carefully for any punctures or damage. Often, inserting a small amount of soapy water around the valve stem will detect leaks.
FAQ
What type of pump is best for beginners?
A good floor pump with a pressure gauge is ideal for beginners. Its ease of use and accurate pressure reading helps in achieving the right tire pressure efficiently and safely.
How often should I check my tire pressure?
Check your tire pressure at least once a week, or more often if you ride frequently. Temperature fluctuations affect pressure, and consistent checks ensure optimal performance and safety.
What should I do if my tire is punctured?
If your tire is punctured, you will need to patch or replace the inner tube. First, remove the wheel from the bicycle, then the tire and inner tube. Identify the puncture, patch it, or replace the inner tube and reassemble the wheel.
What’s the difference between Presta and Schrader valves?
Presta valves are thinner and require a special adapter for some pumps, while Schrader valves are thicker and compatible with most pumps. Presta is generally preferred for higher pressures.
What happens if I overinflate my bike tires?
Overinflation can lead to a bumpy ride and increased risk of tire blowouts and rim damage. It can also reduce tire traction.
What happens if I underinflate my bike tires?
Underinflation increases rolling resistance, slows you down, and significantly increases the risk of pinch flats, where the inner tube is punctured from the tire being pressed against the rim.
Final Thoughts
Mastering how to put air in new bike tires is a fundamental skill for any cyclist. By following these steps and understanding the importance of proper tire pressure, you can ensure a safe, comfortable, and efficient ride every time. Remember to regularly check your tire pressure and address any issues promptly. Happy cycling!